Locust Grove Designs
on Google+

Tile Job Gone Amok

Cepac Hexagon Tile

Have you ever started on a DIY project, thinking it’s going to be a piece of cake, only to have it take you down? Well, that’s hubby and me this week. Although we consider ourselves pro DIY’ers, we often get in over our heads, only to have to eat some humble pie to swim back out. I’m going to share this story with you because hubs is out of town and won’t see this for a few days and I figure if the editor of This Old House can write about his goof-ups on his home renovation, then I can too.

It started quite innocently. We’ve been planning our bathroom renovation for 5 years (okay, I HAVE been planning our renovation for 5 years) and finally decided to get to it before we headed back outdoors to finish our exterior projects that we’ve been working on for the last two summers. So, we looked for and found the “perfect” tile – Cepac‘s pricey hexagon sheets for a mere $15.80 per square foot. If you know me, you know I do not spend a lot of money on any one thing (I love beautiful things but I’m a serious bargain shopper) so this was a hard pill to swallow for me. I guess I should state here that I did manage to finagle a pretty nice discount but only because we have bought our tile at the tile store before and I am “in the business.” Oh, and because no one had ever ordered it before because it’s so expensive.

We ordered our tile, waited a week, then  hubby finally ripped out the antique heart of pine plank floor-don’t worry it will be reused later in this project-laid down a new sub-floor and the heat mat (I am so excited about this!). Now stay with me because here’s where things start to get ugly. My husband is great at many, many things. But, he is not good at mudding sheetrock which as it turns out, is very similar to spreading thin set. The thin set became a several day nightmare, and finally Pete decided to get self-leveling thin set, which he had avoided doing because it is expensive and time consuming for preparation. He gets the new, time consuming thin set all prepared and within an afternoon, we have a beautiful floor, all ready for our tile made of gold. So much for saving time and money with the cheap stuff (I know this but sometimes you have to pick your battles). And now, we have at least a 1/2″ of thin set on the floor, on top of the sub-floor, under the tile – we’ll need a step stool to get into the bathroom!

We’ve laid many, many square feet of tile in our 9 years of renovating houses as well as a very intricate herringbone patterned patio, so we were unprepared for the nightmare that is laying hexagon tile. Thankfully I was downstairs with my boys when I heard the swearing begin. I turned up the TV and ran upstairs to see what was going on. Hubs had laid several sheets of our tricky, custom border when he realized things were out of line. So, I helped him pull it up, and he started over. The boys and I high-tailed it out of the house to get a Paper Jamz guitar.  A few hours later, I return to see the furrowed brow of my beloved and the face of a man who has been beaten down. Turns out he had laid another set of tiles but the mesh had become wet, began disintegrating and was moving around in the thin set so once again, the spacing was off. Again we pulled up the tile-I was assigned “clean the million tiles” job. Did I mention this was my 40th birthday? We decided to clean up and start again the next day. I did get a surprise party later that night so the whole day wasn’t lost!

Sunday. Pete does some research and comes up with a new plan. The tiles go right in; they look lovely; he’s as happy as can be. For the moment.

Monday. Pete does a tile check and discovers that several tiles are coming up off the floor. Of course, none were the ones that will eventually make up our florette pattern-that would be way too easy. He and my 5 year old pull up the loose tiles and my husband is once again a broken man (and Ben tells on Dad for the tiles coming up!).

Tuesday. Hubs goes out of town and there sits the floor, tiles popping up all over the place.

Thursday. I can’t say we’ve solved this problem yet, but as with all of our projects, we will figure it out and it will look amazing. And, we’ll have a good story to tell at our next BBQ!

Have a renovation or remodeling story from hell? Please share it below or head over to my Facebook page and leave it there!

Spring Mini-Makeover #1: Chair Redo – the final chapter

Chair redo

So, it’s finally done. I wasn’t able to find the edging that I wanted so I used a brown woven ribbon that came off of a Tag blanket that’s been down in my basement since last year. Now for my full disclosure – I did spend more than $4. I know, I tried to keep it at $4 because I said that I would – BUT – in my defense, I had to get an electric stapler to save my poor elbows (I had elbow surgery last November). Add $24.99 after coupon. That said, I’m probably going to take it back because for every staple that actually made it into the chair, I had 20 more smoosh against the wood without so much as a nick (see Before picture on my previous post).

Oh, I also ran out of red ink in my Sharpie marker so I had to buy a pack of 3 to get the red.  Another $3.09.  And, I will end up buying the red ribbon to frame the fabric when I find it so that might tick up the price to about $15. I still say “not bad.”

“Sharpie marker?” you ask? “What did she use a Sharpie marker for?” Well, the burlap I bought was plain old brown and I wanted something a little bit more special. So, to mimic the look of an old grain cloth (which I am completely obsessed with!), I taped off the lines on the fabric and colored them in with a Sharpie marker. When I first did this, my son had a friend over. They came into the kitchen to see what I was doing and they both freaked out that I was coloring on my chair (as if my mom might send me to my room!). I started to run out of ink on the skinnier line on the bottom but then decided I liked that it was a little bit “faded”.  Unfortunately I couldn’t replicate the faded look on the back piece with my brand new marker.

Overall, I’m pretty happy with my little chair. It was a fun, quick, cheap project. I learned one thing – I did not miss my calling as a re-upholsterer (is that a word?).

Now, where to put it?

Have a chair story to share? Re-upholstery or fabric question to ask? Leave a comment below or head on over to my Facebook page and post on my Wall.


Spring Mini-Makeover #1

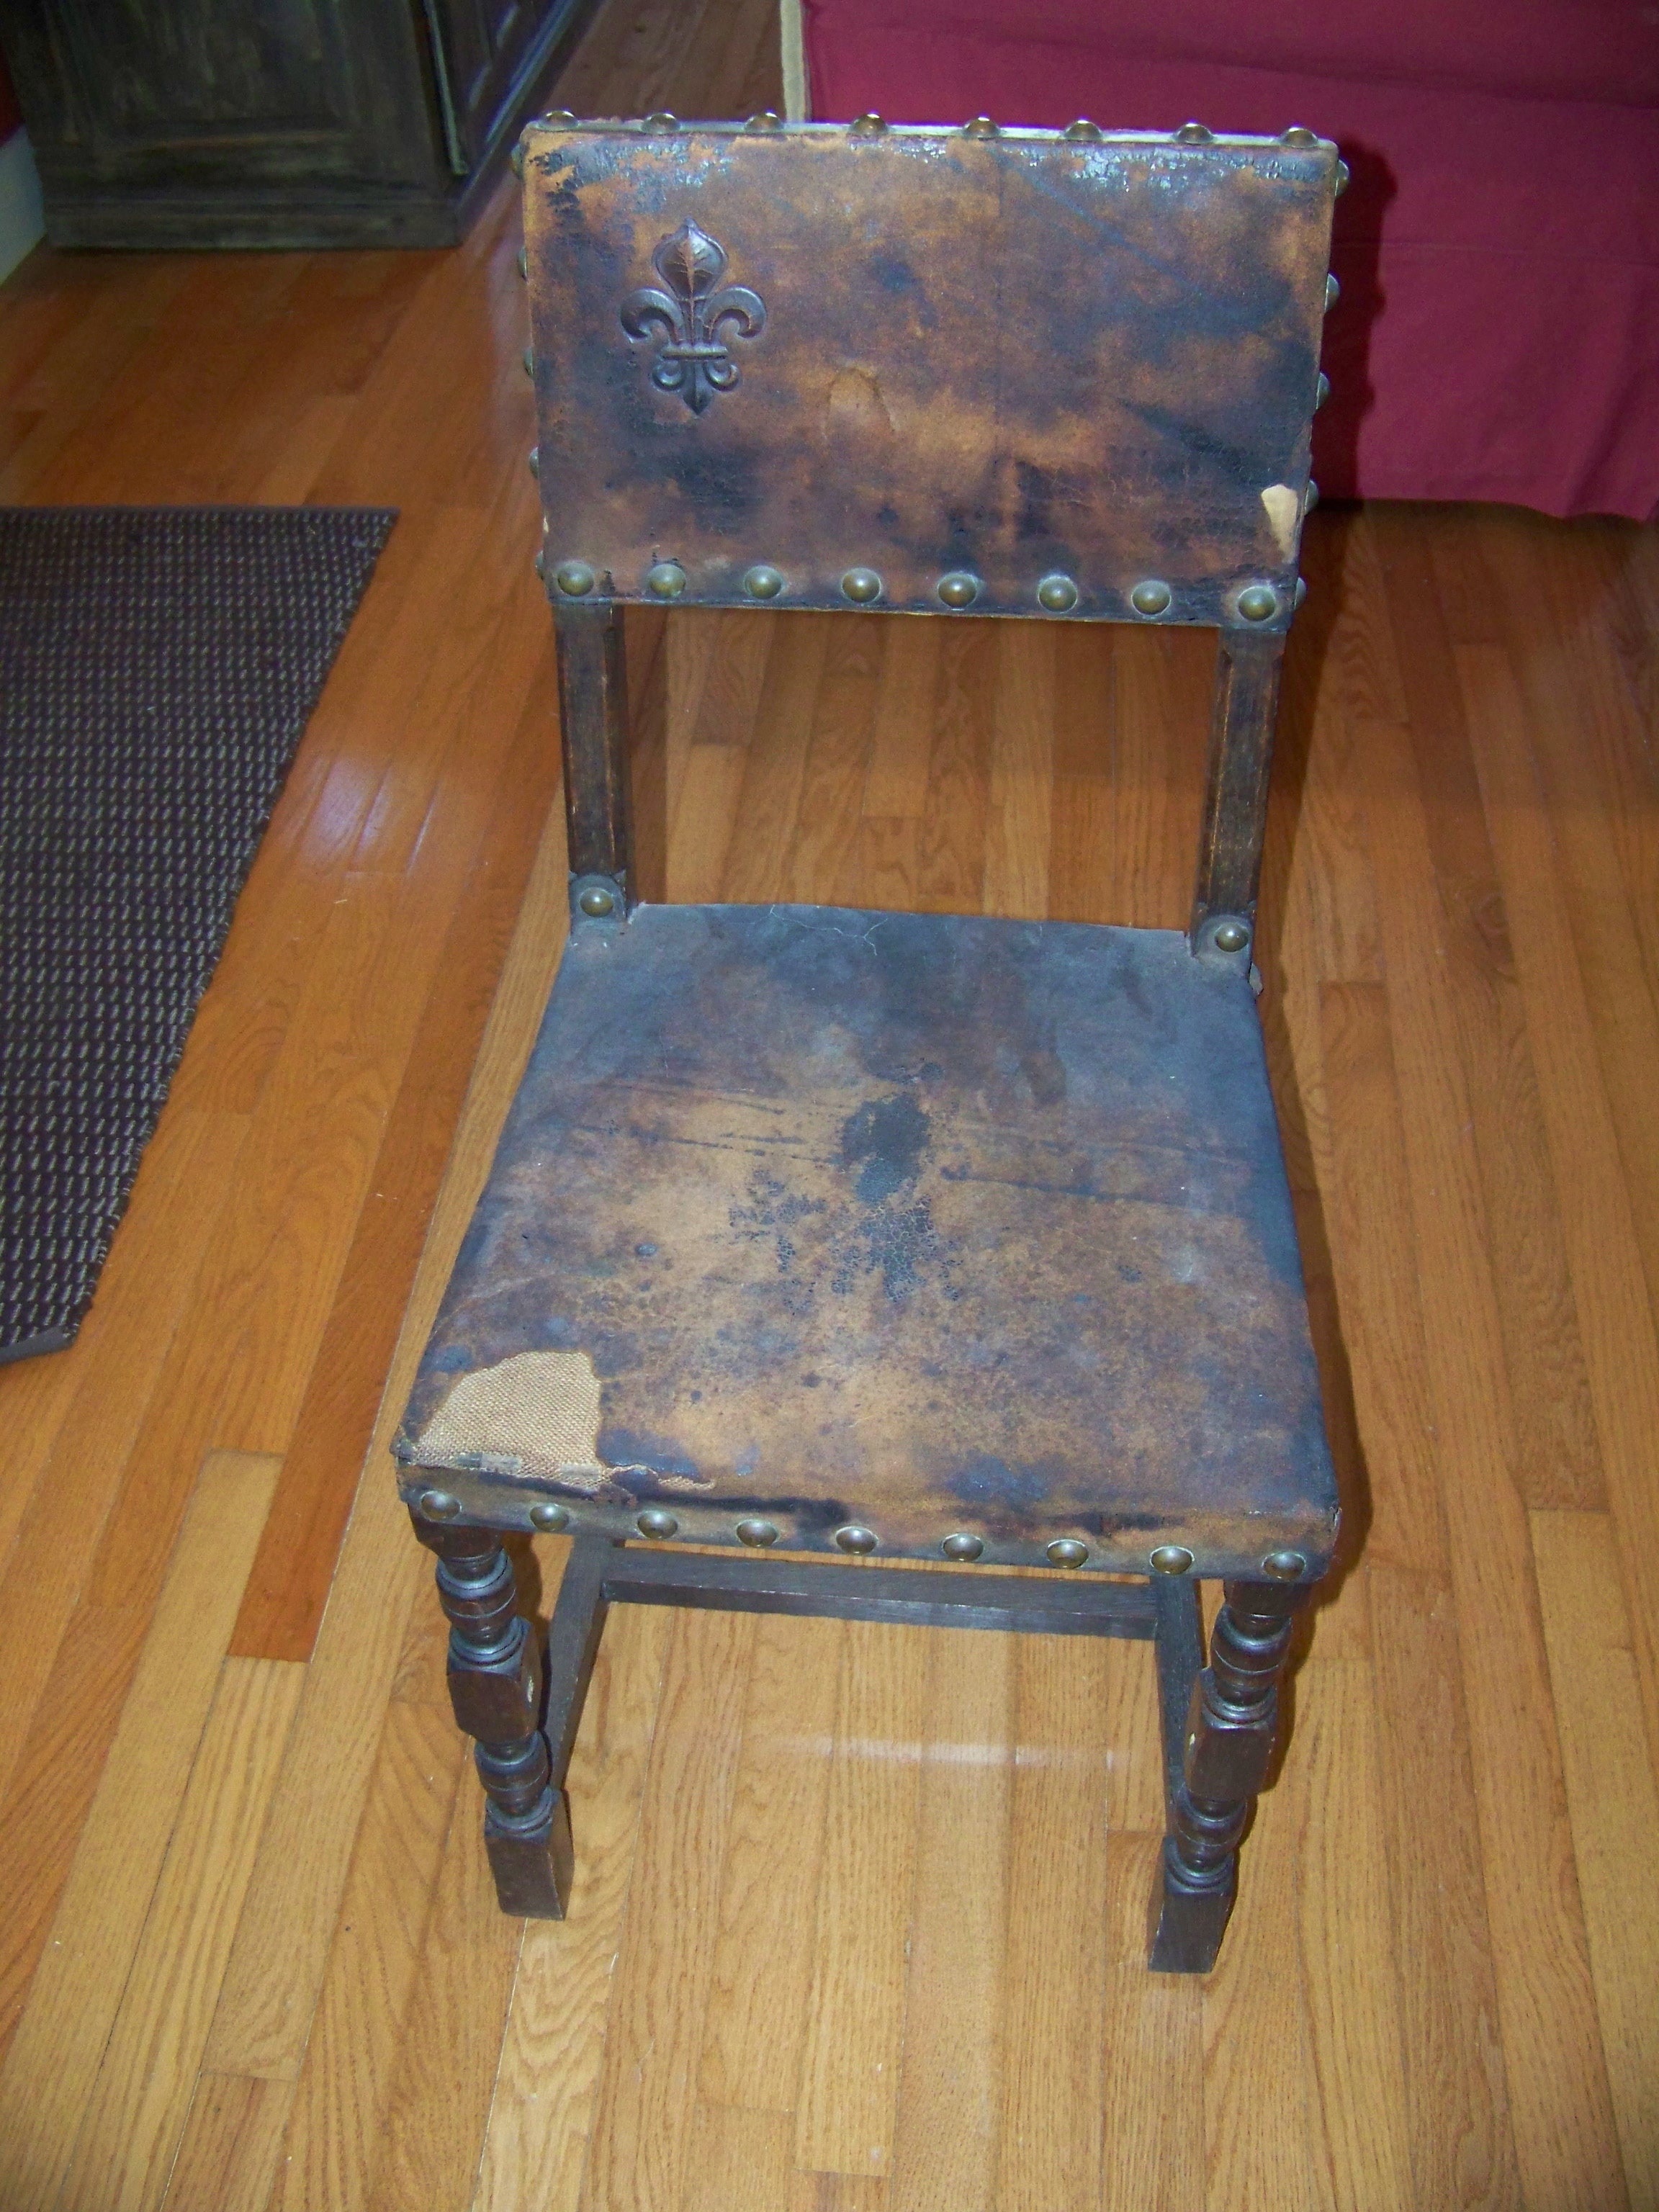
Old Chair

Inspired by my upcoming article on my top five spring (cheap) mini-makeovers in Your Hometowne, our local happenings guide, I decided to do a quick makeover on a chair that has been screaming for it for years. I have to admit, I really thought this chair was something special when I bought it. I was certain it was 18th or early 19th century and was someday going to pay for my retirement (a HUGE return on investment for my $15!). I’ve schlepped this chair all over the United States, praying Antiques Roadshow would turn up in my town.

Over the years of moving and two kids (and a husband) later, it became apparent that my little gold mine was really just a dumpy chair that either needed to be thrown out or recovered. So today, I dragged it downstairs and started to remove its centuries-old leather and hand hammered nailheads. Turns out the nailheads are some cheap aluminum painted to look like aged bronze, but the chair was stuffed with horse hair so that was kind of exciting. And it is made from nice, heavy oak so it’s a pretty sturdy little thing. The leather was so brittle it literally fell apart in my hands and it ended up being a huge, messy job.

I stopped into Joann Fabrics today (because we don’t have any other reasonable fabric stores in our area), and picked up some burlap for a whopping $3.99. I’m now trying to decide if I should just staple it on and trim the edges or maybe I’ll make a cute little ruffley skirt around the edge. I do like the legs on the front so I kind of want to show them off. I’m also toying with the idea of painting the frame but can’t make the commitment to spend my birthday weekend covered in paint.

Stay tuned to see what becomes of my little chair and if you have a chair story, please head over to my Facebook page and share!

Help Your Home Sell Itself

It’s hard to believe but spring really is just around the corner. Come spring, even more people will begin listing their homes, with great hopes of a fast sale. Do you have a plan for selling your house? How does the competition compare? What are your plans for making your home stand out in the sea of buyer’s choice?

Before putting up that for sale sign, take a good, long look at your home. Not from your perspective but from the perspective of someone who is trying to find “the perfect home” for their family. The key to a successful home listing is making your home as attractive as possible to the largest number of people. How do you do that? Very simple: Put away those Hummels and Lladrós, pack away the cat prints and dried flower arrangements, and make the rooms as clean and clutter free as possible.

It’s not necessary to move all your things to storage or to completely strip your home of all personal items; you do have to live there after all. If you have a lot of furniture or accessories in your rooms, start with one room and take everything out. Not sure if you have too much stuff? Ask your Realtor or a very honest friend. Clean the room from top to bottom: use a clean dust mop to wipe down the walls and ceiling, clean ceiling fans, light fixtures, blinds and floors – don’t forget the closets. Finally, decide if the room needs to be painted. If it’s been several years since you’ve had it painted and the walls look a little worn, or if it’s painted a bright or dated color (forest green, anyone?), it’s time to freshen up.

After cleaning and painting, slowly and purposefully, bring key pieces of furniture back into the room to set your stage: raid other rooms if necessary for the proper pieces. Once you have your furniture arrangement settled, bring back in the minimal (and I do mean minimal) number of accessories to give the room some personality. Unsure where to start? Kitchens and baths can make or break a home sale so start there and work your way through the house, basement and garage.

It can be quite difficult to de-personalize your own space. The best bet is to hire a professional decorator who will not only help you make these decisions, but also help choose paint colors and organize the items you will be moving to your new castle. For a few hundred to a few thousand dollars, professional staging can increase the sale price of a home by 5-50% (source: NAR) and can help reduce the number of days on the market from 200 to fewer than 33. For a very minimal investment, the payback can be well worth it.

For showings, be sure to put away the mail, clean off the counters and give the room a quick run through to dust and tidy. Turn on lots of lights and open up the blinds, shades and drapes. Make your home as inviting as possible. You love living there and after all your hard work, the next family will too.